Zebra Cakes: Easy Recipe for a Striped, Fun Dessert
Ever wanted a dessert that looks as amazing as it tastes? Zebra cakes are the ultimate treat. They turn simple ingredients into a stunning visual masterpiece. These treats mix chocolate and vanilla batters into mesmerizing stripes.
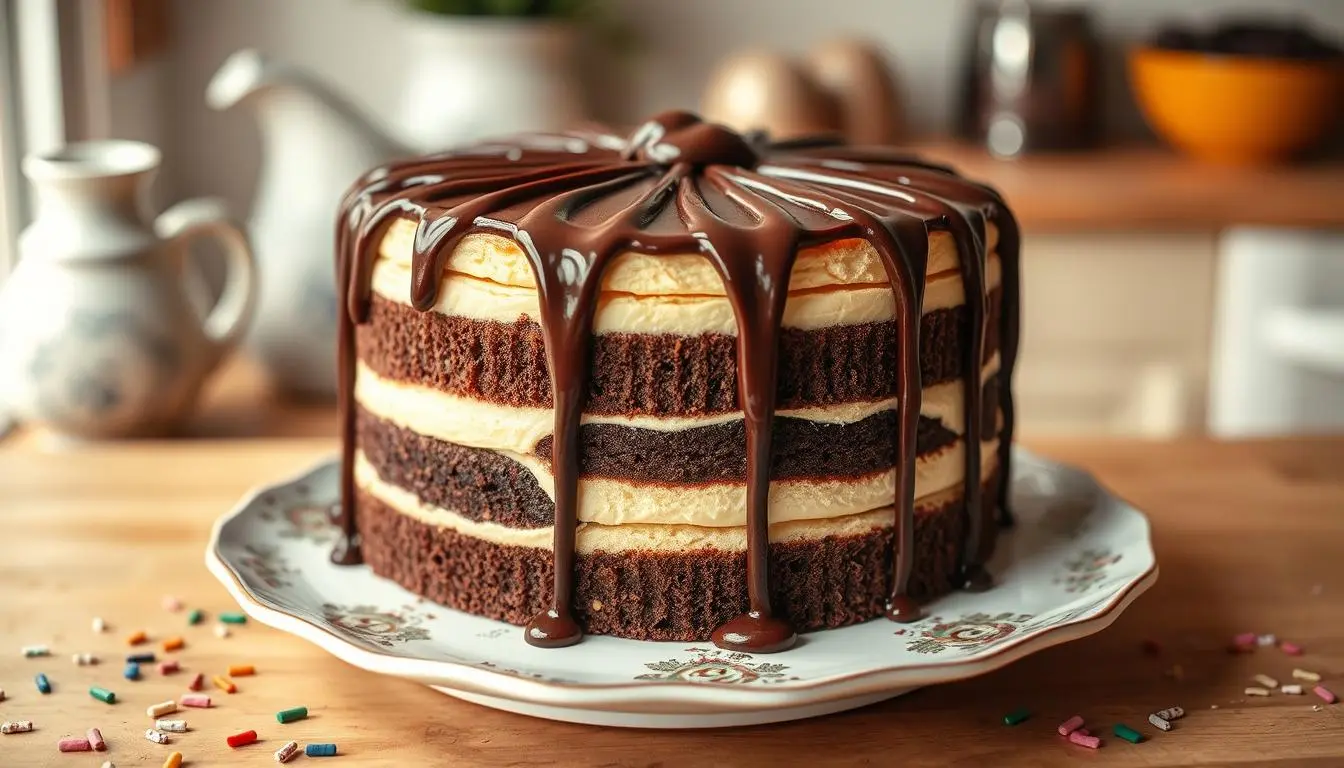
Imagine cutting into a cake and seeing perfect stripes of chocolate and vanilla. Your zebra cake recipe is more than just a dessert. It’s an experience that delights both your eyes and taste buds. With just 10 minutes of prep and less than an hour of baking, you can make a show-stopping treat.
Whether you’re new to baking or a pro, this zebra cake recipe is special. Its unique marbled design is perfect for birthdays, gatherings, or just satisfying your sweet tooth. Get ready to learn how to make a dessert that looks like it came from a professional bakery.
In this guide, you’ll learn all about making the perfect zebra cake. From picking ingredients to mastering the striped technique. Your baking adventure starts now!
Table of Contents
The History and Origins of Zebra Cakes
Explore the world of zebra cakes, a sweet treat with a rich history. These treats have won the hearts of many, combining beauty with taste.
The story of zebra cakes goes back to old European baking. Bakers started making marbled cakes, leading to the zebra pattern we love today.
Traditional European Roots
European bakers were the first to make stunning cakes with different batters. This idea came from many traditions, like:
- Germany’s detailed baking
- Scandinavian dessert innovations
- Italian torta bicolore designs
Evolution of the Modern Zebra Cake
As baking got better, zebra cake ingredients improved too. The striped look went from hard to do to easy for home bakers.
“Baking is an art that connects generations through flavor and creativity” – Anonymous Pastry Chef
Cultural Significance
Zebra cakes are more than dessert. They show creativity in cooking and the happiness of sharing treats with family. Each culture adds its own twist to this classic cake.
| Region | Unique Zebra Cake Characteristic |
|---|---|
| Indonesia | Kue Zebra with local spice influences |
| United States | Little Debbie commercial version popularized in 1960 |
| Europe | Traditional marble cake techniques |
Whether you’re a pro baker or just love to cook at home, zebra cakes keep inspiring and pleasing people everywhere.
Essential Ingredients for Perfect Zebra Cake

Making the perfect zebra cake begins with picking top-notch ingredients. Your chocolate zebra cakes will go from good to great with the right stuff. Knowing what each ingredient does is key to a tasty treat.
Here’s what you’ll need for your zebra cake:
- Dry Ingredients:
- 2¼ cups all-purpose flour
- 1½ teaspoons baking powder
- 3 tablespoons cocoa powder
- 1 cup granulated sugar
- Wet Ingredients:
- 3 large eggs (room temperature)
- ¾ cup vegetable oil
- ½ cup warm milk
- 1 teaspoon vanilla extract
Choosing quality ingredients is important. For chocolate zebra cakes, pick high-quality cocoa powder for a rich flavor. Use room temperature eggs for a batter that blends well.
“Baking is a science, and each ingredient plays a critical role in your cake’s success.” – Professional Baker
Pro tip: Always measure ingredients carefully. Small changes can affect your cake’s texture and taste. Sift dry ingredients to avoid lumps and mix evenly.
Ingredient Recommendations
- Use caster sugar for smoother melting
- Choose a flavorless vegetable oil
- Opt for pure vanilla extract
- Select Dutch-processed cocoa for deeper color
Step-by-Step Baking Instructions
Making the perfect zebra cake is all about precision and creativity. This easy zebra cake recipe will help you make a dessert that’s as beautiful as it is delicious.
Preparing the Batter
First, gather all your ingredients for the zebra cake. You’ll need to separate your dry and wet ingredients carefully:
- Sift 1 ¾ cups of flour
- Add 1 ½ teaspoons of baking powder
- Prepare ½ cup milk for vanilla batter
- Mix 2 heaping tablespoons of cocoa powder for chocolate batter
Creating the Signature Pattern
The magic of an easy zebra cake is its unique striped look. Follow these steps:
- Divide your batter into two separate bowls
- Create vanilla and chocolate batters
- Use 3 tablespoons of batter per layer
- Alternate pouring vanilla and chocolate batters in the center of the pan
Baking Tips and Techniques
To get the perfect zebra cake, pay close attention to detail:
| Baking Parameter | Specification |
|---|---|
| Oven Temperature | 320°F |
| Baking Time | 45 minutes |
| Toothpick Test | Insert to check for clean removal |
| Cooling Time | 15 minutes before removing from pan |
“The key to a perfect zebra cake is patience and precision in layering.” – Baking Enthuasiast
Pro tip: Avoid opening the oven door during the first 30 minutes of baking to maintain consistent temperature and ensure even cooking.
The Art of Creating Perfect Zebra Stripes

Mastering zebra cake decoration is all about precision and creativity. The secret to stunning zebra cake ideas is in the batter layering technique. Your goal is to create mesmerizing alternating stripes that make the cake visually captivating.
To achieve the perfect zebra stripes, follow these essential tips:
- Use two contrasting batters (typically vanilla and chocolate)
- Ensure both batters have similar consistency
- Use a precise pouring technique
“The magic of zebra cake decoration is in the details of how you layer your batter.”
The key technique involves pouring batters strategically:
- Start by adding 3 tablespoons of vanilla batter to the center of the pan
- Directly add 3 tablespoons of chocolate batter on top of the vanilla batter
- Repeat this process, alternating colors
Your batter will naturally spread and create beautiful concentric rings. Minimal swirling keeps the distinct stripe pattern intact.
| Technique | Result |
|---|---|
| Center Pouring | Defined, Sharp Stripes |
| Side Pouring | Blurred, Mixed Pattern |
| Excessive Swirling | Muddy, Indistinct Stripes |
Practice makes perfect with zebra cake decoration. Each attempt will help you refine your technique and create increasingly stunning visual presentations.
Professional Tips for Decorating Your Zebra Cakes
Decorating zebra cakes is an art that makes your baking stand out. With the right frosting techniques, your dessert becomes a feast for the eyes and taste buds.
Glazing Techniques for Perfect Finish
Mastering glazing is key to great zebra cake frosting. Here are some pro tips:
- Classic chocolate drizzle for rich, decadent flavor
- Vanilla bean glaze for elegant, smooth coverage
- Cream cheese glaze for tangy, luxurious texture
Creative Toppings and Garnishes
Take your zebra cake to the next level with these garnish ideas:
- Sprinkle toasted almond slivers for crunch
- Dust with edible gold shimmer powder
- Arrange fresh berries in strategic patterns
- Use candied citrus peels for bright accent
Storage and Presentation Strategies
Keep your masterpiece fresh with smart storage. Refrigerate glazed zebra cakes in an airtight container. Allow it to reach room temperature before serving for optimal taste and texture.
“A beautifully decorated cake is a feast for both eyes and palate” – Professional Pastry Chef
Zebra cake decoration is all about creativity and personal touch. Feel free to try new glazing and topping combos that show off your style.
Recipe Variations and Flavor Combinations
Exploring chocolate zebra cakes opens up a world of delightful culinary creativity. Your standard zebra cake recipe can transform into an extraordinary dessert with just a few innovative tweaks. Zebra cake ideas are limited only by your imagination!
Let’s dive into some exciting flavor combinations that will elevate your zebra cake from ordinary to extraordinary:
- Citrus Twist: Add orange or lemon zest to brighten the classic chocolate zebra cake
- Coffee Lover’s Dream: Incorporate espresso powder for a rich, deep flavor
- Caramel Delight: Drizzle caramel between cake layers for extra indulgence
- Nutty Adventure: Sprinkle chopped almonds or walnuts between batter layers
For those who love chocolate zebra cakes, consider these decadent variations:
- Dark Chocolate Intense: Use high-quality dark chocolate in alternating layers
- White Chocolate Marble: Blend white chocolate into one of the batters
- Mocha Magic: Combine coffee and chocolate for a sophisticated flavor profile
“The beauty of zebra cakes lies in their versatility and visual appeal!” – Pastry Chef Emma Rodriguez
When experimenting with zebra cake ideas, remember that balance is key. Start with small modifications and taste as you go. Your unique twist might become the next family favorite!
- Pro Tip: Always use room temperature ingredients for the smoothest batter
- Try using different extracts such as vanilla, almond, or coconut for a unique flavor twist.
Whether you’re baking for a special occasion or simply craving a delicious treat, these zebra cake variations will surely impress your family and friends.
Conclusion
Making homemade zebra cakes is a fun journey. It turns simple ingredients into a beautiful dessert. You’ll be able to make these treats with ease, impressing everyone with your baking skills.
By learning how to make zebra cakes, you’ve found a recipe that’s easy to customize. It’s perfect for any occasion or taste.
While store-bought zebra cakes are convenient, baking your own is more rewarding. You get to choose what goes into your dessert, making it healthier. It’s not just about making a tasty treat, but also enjoying the baking process.
Remember, the more you bake, the better you’ll get. Each time, you’ll improve your skills and learn more about making those perfect stripes. Whether it’s for a family event or a personal treat, your zebra cake skills will be a valuable part of your cooking.
So, get ready to bake! Preheat your oven and start with your ingredients. Your zebra cake journey is just starting, and the tasty possibilities are endless!
FAQ
What makes zebra cakes unique compared to other cake designs?
Are zebra cakes difficult to make for beginner bakers?
Can I create variations of the traditional zebra cake recipe?
What type of cocoa powder works best for zebra cakes?
How long do homemade zebra cakes typically stay fresh?
Can zebra cakes be made gluten-free or dairy-free?
What are some recommended decorating techniques for zebra cakes?
Are there any common mistakes to avoid when making zebra cakes?
Zebra Cakes: Easy Recipe for a Striped, Fun Dessert
Equipment
- 2 mixing bowls (for wet and dry ingredients)
- 9-inch round cake pan (or any similar size)
- Sifter (for dry ingredients)
- Hand mixer or whisk
- Spatula
- Toothpick or cake tester (for checking doneness)
- Cooling rack (optional but recommended)
Ingredients
Dry Ingredients:
- 2¼ cups all-purpose flour
- 1½ teaspoons baking powder
- 3 tablespoons cocoa powder
- 1 cup granulated sugar
Wet Ingredients:
- 3 large eggs room temperature
- ¾ cup vegetable oil
- ½ cup warm milk
- 1 teaspoon vanilla extract
Instructions
Preheat Oven & Prepare Pan:
- Preheat the oven to 320°F (160°C). Grease and flour a 9-inch round cake pan, or line it with parchment paper.
Prepare Dry Ingredients:
- In a mixing bowl, sift together the flour, baking powder, and cocoa powder. Set aside.
Prepare Wet Ingredients:
- In a separate bowl, whisk together the eggs, oil, milk, and vanilla extract until well combined.
Combine Wet & Dry Ingredients:
- Gradually mix the wet ingredients into the dry ingredients. Stir until smooth and fully combined. Make sure the batter is well-blended with no lumps.
Divide the Batter:
- Split the batter evenly into two bowls. Leave one bowl as is for the vanilla batter. In the second bowl, mix in 2 tablespoons of cocoa powder to make the chocolate batter.
Layer the Batters:
- For the signature zebra stripes, spoon 3 tablespoons of the vanilla batter into the center of the prepared cake pan. Then spoon 3 tablespoons of the chocolate batter directly on top of the vanilla batter. Repeat this process, alternating between the vanilla and chocolate batters, until both batters are used up.
Bake the Cake:
- Bake for 45 minutes, or until a toothpick inserted into the center comes out clean. Don’t open the oven door for the first 30 minutes to maintain even heat.
Cool the Cake:
- Let the cake cool in the pan for 10-15 minutes. Then transfer it to a cooling rack to cool completely.
Decorate (Optional):
- If desired, glaze the cake with chocolate or vanilla frosting, or add toppings like toasted almonds or fresh berries for extra flavor and presentation.
Did You Try Our Recipe?
There are no reviews yet. Be the first one to write one.